
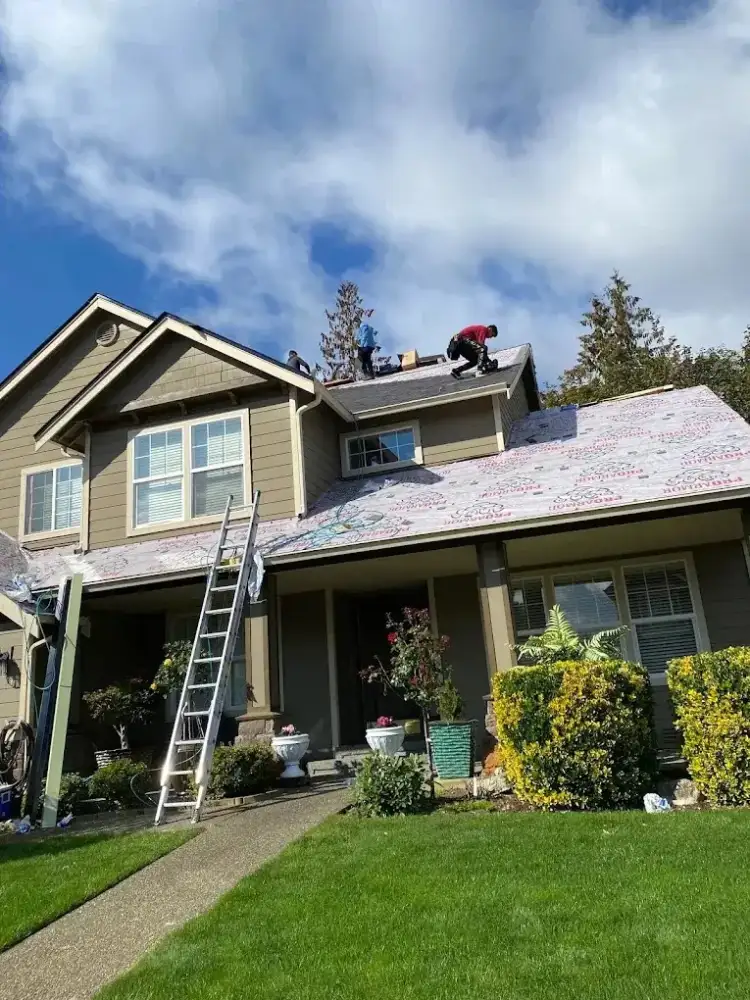
Short answer: if your roof needs replacing in 2027, do the planning in winter and the work in a dry stretch. Use November through February for an inspection, written estimates and choosing materials. Use late winter and early spring to settle HOA approval, financing and insurance questions, and to put a date on a contractor's calendar. The installation itself usually comes down to a few days of work; most residential roof replacements take 1–3 days. After that, a short list of after-care steps protects what you just paid for.
What follows is a month-by-month timeline. It isn't a forecast of prices, codes or weather for 2027, because nobody can promise those. It's a sequence: what to do first, what depends on what, and which questions to ask at each step so nothing gets decided in a hurry.
Why winter is planning season
Almost every step of a roof replacement except the installation can happen in the rain. Inspections, measurements, estimates, material samples, HOA paperwork and financing all work fine in January. What doesn't work well in a wet month is opening a roof. So the homeowners who have the smoothest replacements tend to treat the dark months as a runway: they arrive at spring with a signed scope, a chosen material and approvals in hand, and they simply wait for a date.
The homeowners who have the hardest time usually start in May. Then every step stacks on top of the others: estimates, approvals and scheduling all happen at once, often while the roof is already giving trouble. For a longer look at seasons and scheduling, see the best time of year to replace a roof in Washington.
November–December: get the facts about your roof
Start with an inspection, not an estimate. You want to know three things: how much life the roof really has left, whether anything needs attention before winter, and whether replacement is actually the right answer.
- Book an inspection before you book a replacement. A thorough inspection looks at shingles, flashing around chimneys, skylights and walls, vents, the edges and valleys, and gutters, and it should include the attic if you can give access. Ask for photos of what the inspector saw.
- Write down what you already know. The roof's age if you have it, any past leaks, stains on ceilings, previous repairs, and whether there's more than one layer of shingles. That history shapes the recommendation.
- Handle anything urgent now. If the inspection turns up a loose flashing or a damaged section, a repair this winter can carry the roof through to a planned replacement instead of an emergency one.
An honest inspection doesn't always end in a sale. One homeowner wrote that the inspector "gave me honest advice that no repair is needed at this time—just keep an eye on it." You can read that inspection review. If your roof has years left, the best 2027 plan may be maintenance, not replacement. If you aren't sure which way your roof leans, our comparison of repair, overlay and full replacement sets out when each one makes sense.
January: collect written estimates
January is a good month to gather estimates because you're not racing the weather. Aim for two or three, all in writing, all covering the same scope so you can compare them line by line rather than by the total at the bottom.
A complete replacement estimate should spell out:
- Tear-off of existing layers, or a clear explanation if a contractor proposes going over the top.
- The underlayment, ice and water barrier locations, drip edge and starter course.
- Flashing: whether chimney, wall and skylight flashing is replaced or reused.
- Ventilation: intake and exhaust, and whether the current setup is adequate.
- How rotted or soft decking will be handled, and the unit price if replacement sheets are needed.
- Skylights, if you have them, and whether they're being replaced at the same time.
- Cleanup, magnet sweeps for nails, disposal and gutter cleanout at the end.
- Warranty terms in writing, for both the materials and the workmanship.
If one bid is much lower than the others, look for the line that's missing. It's usually ventilation, flashing or decking.
February: choose your material
With estimates in hand, decide on the roof itself. In the Puget Sound area the realistic choices for most homes are asphalt (composition) shingles, metal, and cedar shake, with flat and low-slope membranes for those roof sections that need them. Each has different up-front cost, lifespan, maintenance needs and look.
A few questions help narrow it down:
- How long do you plan to stay? If you're selling in a few years, the up-front cost matters more. If this is the house you'll stay in, lifespan and maintenance matter more.
- How shaded is the roof? Roofs under tall evergreens collect needles and moss faster, which affects both material choice and how much maintenance you're signing up for.
- What does the neighborhood or HOA allow? Some communities restrict colors, profiles or materials.
- Are there features to plan around? Skylights, chimneys, solar plans and low-slope sections all affect the choice.
Our roofing materials comparison for the Puget Sound area lays out cost tiers, lifespan and upkeep side by side. Ask any contractor which brands and product lines they install and why; First Choice installs Owens Corning, Malarkey, CertainTeed and IKO shingles.
March: approvals, financing and insurance questions
March is for paperwork. None of it is difficult, but each item can take longer than you expect, and any one of them can hold up a start date.
HOA approval
If you have a homeowners association, read the architectural guidelines before you sign anything. Many associations want a written application with the material, color and sometimes a sample or product sheet, and their review committees meet on a schedule. Submit early, keep a copy of the approval, and share it with your contractor.
Permits
Ask your contractor whether your city requires a permit for your project and who pulls it. Rules vary by jurisdiction and scope, so don't assume. Get the answer in writing as part of the estimate.
Financing
If you aren't paying from savings, compare options now rather than in a hurry later. Common routes include a home equity loan or line of credit, a personal loan, or a financing program offered through a contractor or lender. Read the terms carefully, ask about promotional periods and what happens when they end, and line up the payment schedule in the contract with when your funds will be available.
Insurance questions
Call your insurance agent and ask, in general terms, how your policy treats roof claims and whether a new roof affects your coverage. If any part of the replacement is driven by storm damage, that needs to be documented and reported before work starts. Our guide to roof insurance claims explains how that process works.
April: book your date
Once you've chosen a contractor and a material, get on the calendar. Drier months are popular for good reason, so booking in spring rather than waiting for the first sunny week gives you more choice of dates.
Before you sign, confirm:
- The target start window, and how the contractor decides whether a day is dry enough to open the roof.
- What happens if weather interrupts the job partway through.
- The payment schedule and what milestone triggers each payment.
- Who your contact is during the job, and how they'll reach you.
- Whether the crew is employees or subcontractors. First Choice crews are certified full-time employees.
May–September: the replacement itself
When the date arrives, the work moves quickly. Most residential roof replacements take 1–3 days. Here's what a typical sequence looks like, in general terms:
- Protection and setup. Tarps go over landscaping, a dumpster or trailer is positioned, and ladders and safety equipment go up.
- Tear-off. Old shingles and underlayment come off one section at a time. A careful crew only opens what it can dry in that day.
- Decking check. With the roof open, soft or rotted sheathing becomes visible. This is when you may get a call about replacement sheets, priced per the estimate.
- Dry-in. Underlayment, ice and water barrier, and drip edge go down, which protects the house even before shingles are on.
- Roofing and flashing. Shingles or panels go on, with new flashing at walls, chimneys, skylights and vents, plus ridge and ventilation details.
- Cleanup and walkaround. Debris removal, nail sweeps across the yard and driveway, gutter cleanout, and a final look at the finished roof.
A few practical things make install days easier: move vehicles out of the driveway, take pictures off walls on the top floor (hammering vibrates through framing), keep pets and kids away from the work zone, and clear a path for the crew to the roof edges. If you have attic storage directly under the roof, cover it, since some dust and granules can fall through during tear-off.
Communication matters as much as craftsmanship. After a Seattle replacement, one homeowner wrote that "communication was clear from start to finish." You can read the full Seattle roof replacement review. That's a good standard to set with any contractor before the first shingle comes off.
After the install: the first year
A new roof needs less attention than an old one, but not none. A few habits protect your investment:
- Keep your paperwork together. The contract, invoice, material warranty registration, workmanship warranty, permit sign-off if any, and the contractor's photos. You'll want them when you sell, refinance or file a claim.
- Take your own baseline photos. Walk around the house and photograph each roof slope from the ground. Those pictures make it much easier to spot changes later.
- Watch the first heavy rain. Check the attic and top-floor ceilings after the first big storm. Problems on a new roof, if there are any, tend to show early.
- Keep gutters and valleys clear. A new roof still depends on water leaving it. Clean gutters in fall and again in spring, more often under heavy tree cover.
- Stay ahead of moss. On shaded roofs, moss can start returning within a few seasons. Catching it early is far easier than removing an established mat.
If your plans change partway through
Timelines slip. A storm in January can turn a planned replacement into an urgent one, or an inspection can show the roof has more life than you thought. A few rules of thumb keep the plan useful either way:
- If a leak starts before your date, ask for a temporary repair rather than rushing the whole replacement into a wet week. A sound repair buys time for a proper job.
- If the inspection says the roof has years left, put the money toward maintenance, keep the estimates on file, and re-inspect next year.
- If a storm damages the roof, document it and call your insurer before any non-emergency work starts, since that can change how the project is paid for.
- If your budget shifts, ask the contractor which parts of the scope are essential and which are upgrades. Ventilation, flashing and underlayment aren't the places to save.
The point of starting early is that a change in plans becomes a decision, not a scramble.
A one-page 2027 roof replacement checklist
- Nov–Dec: inspection with photos; urgent repairs; note the roof's history.
- Jan: two or three written estimates with matching scopes.
- Feb: choose a material and contractor.
- Mar: HOA application, permit question, financing, insurance call.
- Apr: sign, set a start window, confirm payment schedule and weather plan.
- May–Sep: prepare the house, replacement, final walkaround.
- After: file the paperwork, baseline photos, gutter and moss habits.
First Choice Roof Service is licensed, bonded and insured in Washington and has handled roof replacement across the Greater Puget Sound area for 17+ years. Inspections and written estimates are free and photo-documented. If 2027 is your year, get in touch or call (425) 270-1525 to schedule a free inspection this winter.